Showing posts with label ikea. Show all posts

Friday, August 16, 2013

Ikea Project #7 - Stackable Mini Storage Boxes

 IKEA Project #7 - Stackable Mini Storage Boxes


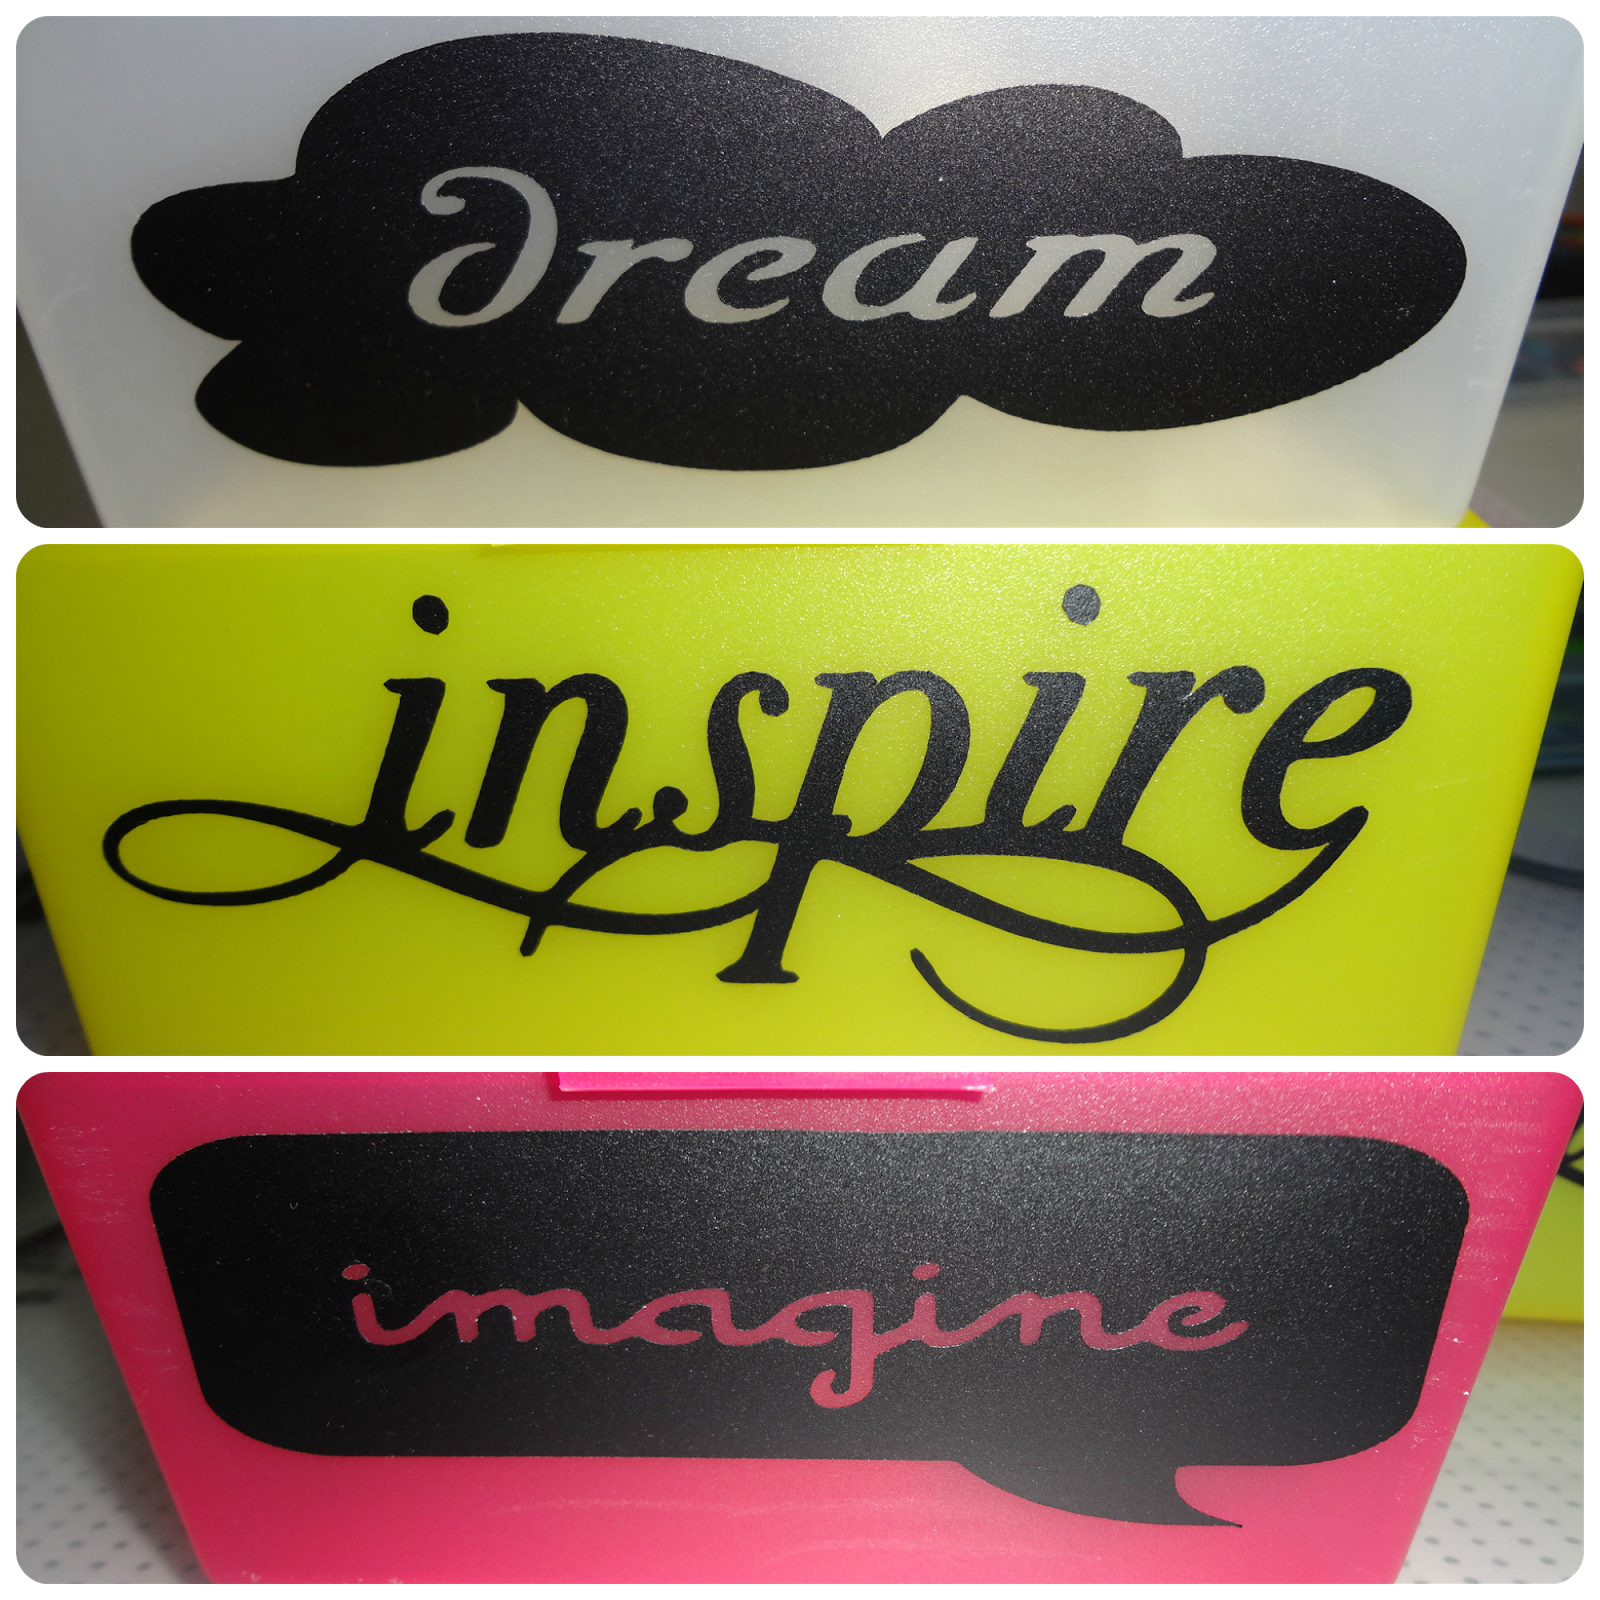
These were the cutest little stackable storage containers. They come in a 3 pack in 2 different sets of colors. One is Pink/Yellow/White and Blue/Green/White.
These would be perfect for your kids art supplies.
I am using them in my office so I decided to put inspiring words on the front of each one. (if you were making them for your kids you could put there names on the front of each container.)

Supplies:

  • Cutting Machine
  • Vinyl (I used black)
  • Design Cartridge or design on the web. (I used Cricut's Home Accents)


Happy Friday!!!
Carrie

Tuesday, August 13, 2013

IKEA Project #6: Fruity Funnel's

IKEA Project #6 - Fruity Funnel's


Supplies:
  • Cricut
  • Home Accents Cartridge
  • Black Vinyl


I chose the pear and apple design. I set my cricut at 1 1/2" height and cut 5 of each design. Then like any other vinyl project, applied the fruit neat the rim of the funnels.

This was a fun and easy project.


Carrie

Sunday, August 11, 2013

IKEA Project #5 - Circus Themed Mobile

IKEA Project #5 - Circus Mobile


I am super excited about this one.
Below is a picture of what it looked like when I bought it from IKEA. This is a white  drying rack found in there laundry section. check it out HERE  


Supplies:
  • IKEA drying racks (white, red or black)
  • Tissue Paper
  • Modge Podge
  • Brush
  • Wire
  • Fabric Strips
  • Ribbon
  • Scrapbook Paper
  • Glue Gun & Glue
  • Pony Beads


The first thing I decided to do to this was add some color to the legs, these legs have an indent area on both sides. I picked out some blue tissue paper, grabbed my modge podge and brush and was ready to rock and roll. To apply the tissue paper, I first spread a little modge podge in the indentation and took a torn piece of tissue paper, pressed the tissue paper onto the modge podge and then took more modge podge and brushed it onto of the paper also, then if there was tissue paper on the sides I would just brush them towards the middle and seal them down.  I also covered the bottom round base with tissue paper also using the same technique.

Once I had the legs finished, I had to decide what theme I wanted. I came across some fantastic scrapbook paper of circus animals and all things circus in the "All About Boys Stack".


To make the Streamers:
Cut out the different designs from the scrapbook pages, organize them a bit on your table so you have a clear idea of how they should be glued onto each ribbon. Take a 10-12" ribbon and glue one design on one side of the ribbon, then turn over and glue the other design on the backside (these need to be the same size). Continue to work down the ribbon (I put 3 sets of designs on each ribbon). you will need 16 strands of ribbons for this part and 96 designs. Once your finished with a strand you can clip it to the mobile using one of the hanging clips.


To make the Big Top:
Take wire and make 2 circles. The first one measuring 2" across and the second one 15" across. I made the circles by taking my wire making a complete circle then going around the entire circle by wrapping more wire around. These are not solid circles, they are still going to bend (that is ok for this project). Now I grabbed red & white fabric. Each strip will me 9" long, you will cut strips at an angle as shown in the below photo (your strips need to be skinnier at the top and wider at the bottom). You will need 16 strips of white and 16 strips of red. Tie each strip onto the smaller wire circle, alternating colors. Now glue the larger wire circle to the top of the 8 legs. To glue the wider ends of the fabric strips to the larger circle follow this order (white onto the wire above one of the legs, red, white, red on the bare wire in between the leg you just used and the following one, repeat until you complete the circle.) I personally did all my white strips first then my red ones. Once all the strips are glued, cut v's into the ends of the fabric that are dangling over the wire.


To finish it all off. I glued yellow ribbon around the entire base (on top of the fabric) and then added a yellow bow to the top and your finished.


Hope you enjoyed this craft project.

Carrie


Saturday, August 10, 2013

Ikea Project #4 - Desktop Workspace

Project #4 I used a clear desk pad from IKEA


Supplies:
  • IKEA clear desk pad (http://www.ikea.com/us/en/catalog/products/66703500/)
  • wrapping paper
  • scissors
  • vinyl
  • Cricut, Silhouette or any other cutting machine
  • temporary adhesive spray
the first step is to lay your wrapping paper onto your desk top (design face up). Spray the temporary adhesive spray on the back side of the desk pad and then slowly apply the desk pad sticky side down onto the top of your wrapping paper. Now take your scissors and trim off the excess wrapping paper around the edges of the pad.  

To decorate the top of my pad I wanted my blog name and a horizontal & vertical ruler. Making projects quicker and easy. (no more looking for a ruler). I designed a 24 inch ruler & 12 inch ruler using inkscape, saving it in a sag file then using my Make the Cut program cut the rulers out of vinyl. Same thing my blog name. (if you want a copy of the ruler design let me know). Once the designs we're cut out. I applied them to the top of my work pad and ta-da. I was very happy with the end results on this one.


Carrie

Friday, August 9, 2013

Ikea Project #3 - Quote or Photo Stand


My #3 Project was a .99 cents stand that is good for quotes or photos. It has 4 pieces, the frame, the base and 2 plastic plates (which are covered with a thin plastic cover that once you are using it you peel off the plates.  I chose to get this in white so that I could personalize it. 


Supplies:
  • Ikea Stand set 
  • Washi tape (color and pattern of your choice)
  • exacto knife
  • modge podge (I used the glitter type)
  • quote printed onto colored paper


To decorate wrap the washi tape around the sides from the inner slot to all the way around to the other side of the slot. Because you need to leave that slot open for the plates and quote to slide in. Use an exacto knife and cut off washi tape using the slot for a guide. Keep doing this step until you get the frame looking like you want it too. Once you have decided you are done. Seal the washi tape onto the frame with modge podge. Let dry.


I chose to go with a princess bride quote. Who doesn't like that movie. there are so many good quotes in that movie. In inkscape I created my quote template. You can do this in word also. I have a printable template below if you like this quote. Print the quote onto colored paper (your choice). Then cut out to match the size of the plastic plates. 

Sandwich the printed quote in between the 2 plastic plates and slide into the frame from the top and you are finished. Now sit back and enjoy glancing at this terrific quote.


Printable Quote:
(click on the image and then choose to print)

Happy Friday!!

Carrie


Thursday, August 8, 2013

Plastic Bag Organizer - IKEA Project #2

IKEA find #2 - Plastic Bag Organizer


I came across this little beauty for either $2.99 or $3.99 (can't remember). It is made of white plastic and you can either mount it to the wall with the sticky strips (attached) or use nails/screws and hang it with the holes in the back. how many times do you have an abundance of plastic bags from grocery shopping and they just get tossed to the side or end up all over the place. I have had that problem, but no longer. Not now that I have this baby. 

Now that we have address it's function.
Let's move onto making it pretty.
I have been using my washi tape on everything lately. So why should this be any different. I found 3 washi tapes that I liked the colors, patterns and they worked together. Taping horizontally up the container I created lines that not only looked great but we're super simple to apply. After finishing the tape design, I sealed it with glitter modge podge. This way it was more durable and would last so much longer. After the modge podge dries it is ready to attach to the wall and start filling.


Another Happy Ending Craft!!

Carrie

Daisy Corkboard's - IKEA Project

I recently attended a blog mixer to celebrate IKEA's new catalog.
After enjoying a nice breakfast and chatting with my fellow bloggers, we all had a chance to check out some of there great products. They also had a educational class on there comfy mattress sets, where we were taught the difference of how each material works and which material is best for your body. Then we of course all took a nap (JK) and tested the mattress's out ourselves.

IKEA is a fun store to not only check out there display rooms (office, bedrooms, kitchens) upstairs ,where you get a ton of inspiration, then downstairs you have more of a store/warehouse set up. I found items for future projects left and right. 
Check out there catalog: Here you can either download it to your computer, ipad or phone.


One of my great finds was a 3 pack of heat trivets for $2.99.  You can find here
these are normally used for putting a hot pot or dish on.

But I had much different plans for these babies. 
Because they are made of cork, I instantly thought of making some decorative cord boards for one of my walls. 

Ta-Da... see how cute these are. I made the flower background out of recycled cardboard and modge podged decorative scrapbook paper onto the cardboard. Once dry then I applied glue with my glue gun unto the back of the cork round and then applied directly to the middle of the flower. 
Now you can tack your important messages or notes onto the cork board. 


Happy Crafting!!!

Carrie