Showing posts with label recipe. Show all posts

Sunday, December 22, 2013

Christmas Series Day 30 - Peanut Butter Popcorn Tree


On the 30th Day of Christmas
Santa brought to me

A great idea to add to your goodie plates!
So I am sharing it with all of you
Today I am personally posting :)


My gift to You is a post on
 "Peanut Butter Popcorn Tree"


Here I am posting the last post for my Terrific Christmas Series. 
We had a lot of great bloggers share some wonderful christmas ideas. 

For the last post of the series I am sharing with you a post of a family tradition. Growing up when we would put goodie plates together for family and friends we would love to make peanut butter popcorn and shape them into trees.  Then once they were shaped we would decorate them with gumdrops. 

This year I wanted to add a little bit more to my trees, so I added licorice ropes and a peppermint pat tie cut into the shape of a star and placed on top.


To make a batch of peanut butter popcorn. 
Get your popcorn popper out and pop 3 quarts of plain unsalted, unbuttered popcorn.
Add a up of chopped up walnuts to the dry popcorn in a large bowl.

Before making the peanut butter mixture clean off a counter or table and lay down waxed paper.

Now on the stove in a pot, turn your stove onto medium high heat. Add  1 cup sugar and 1 cup of karl syrup. Stir the 2 ingredients until the sugar dissolves and it is bubbling (make sure you continually stir through this process so it doesn't burn). Once it is bubbling, take off the stove and add 1 cup of crunchy peanut butter to the mix, continuing to stir. Last ingredient is 2 1/2 tsp of vanilla adding it to the mix. 

Now pour mixture on top of the popcorn in the large bowl and stir until peanut butter mixture covers all the popcorn. 

Dump out onto waxed paper, separate and let cool slightly.

Before popcorn has completely cooled shape into trees, balls or whatever shape you would like. 


Love Bakes Good Cakes

Wednesday, November 20, 2013

Bacon Wrapped Turkey


Juiciest Thanksgiving Turkey Ever!!
 
How can you go wrong with Bacon

Doesn't this Turkey look delicious!!


To make a bacon wrapped turkey.
Prepare your turkey like normal: add stuffing, apply injections
 (whatever you like to do). Then once the turkey is ready to go
in the oven, you cover the entire top and sides with bacon.
 
Turkey ready for the oven and waiting for bacon.


as shown in the above 3 photo's you can see what my finished turkey looks like.
I started with the main part of the bird and criss-crossed strips of bacon over the entire body. If any of the bacon slips just add a toothpick. the tricky part is the legs. Just use shorter pieces of bacon and use more toothpicks to keep in place. The toothpicks will be easy to take out after baking and before carving (the bacon will be crispy after baking and will hold together without them)
 
Quick Note: when covering the body, make sure you don't cover up the thermometer (the red circle shown 2 photo's up)
 
If any of this is confusing, just ask me.
 
Happy November
 
Carrie

Wednesday, May 1, 2013

Caramel Nutty Chocolate Tart


Try a new and fun mini dessert.
Here is my tart creation.
A crusty pastry cup filled with a chocolate, peanut butter, carmel filling topped
 with whipped cream and a cookie dough bite.
Printable recipe is at the bottom of the post.


start off with sifting your flour, add the butter and cream cheese and mix until doughy.


Once you have your dough, roll it into 24 small balls and 
press into your mini muffin pan.


Filling: melt all chocolate and whipping cream in microwave
add to egg yolk, sugar and whipped cream bowl


Bake and let cool. then decorate


Printable Recipe Cards


Happy Baking!!


Linky Parties


Market Yourself Monday                  Strut Your Stuff
Made By You Monday              Metamorphasis Monday
Pink Hippo Party                       Make it Pretty Monday
Handmade Tuesday                       Get Your Craft On       
Tutorials & Tips                         Show Me What Ya Got
It's Party Time!                  What I Whipped up Wednesday
Lil Luna Link Party                       Wow us Wednesday
Hooking Up w/HOH                  Catch a Glimpse Inside
Blog Stalking thursday                  Chic & Crafty Party
Whatever Goes Wednesday             Best DIY Projects
Simple Create Link Party               Show & Tell Friday
Frugal Friday                              the Weekly Creative LP
Sunday Show Off LP

Monday, April 15, 2013

Capt' Krunch Berrie Treat's


I wanted to try to make Rice Krispy Treats with a twist. 

So I went up and down my local stores cereal aisle to see what I could find to trade out for rice krispies cereals. and lo and behold I came across a box of Capt Krunch Berrie Cereal (Only the Berries). Bingo!!!

So these are easy peasy to make.

You just need the cereal and a  couple bags of marshmellows or 2 jars of mallow.
If you go the marshmellow way, you will have to melt down the marshmellows down to the gooey stage yourself.

I thing to remember: when it comes time to mix up the cereal and marshmallow, If you use your hands you want to butter your hands up first, otherwise you will be sticking to EVERYTHING:)


Happy Treat Making!!

Link Parties


Strut Your Stuff
Transformed Tuesday
Take A Look Tuesday
Handmade Tuesday
Kitchen Fun & Crafty
Get Your Craft On
Show Me What Ya Got
Market Yourself Monday
Made By you Monday

Monday, April 8, 2013

Chocolate Ganache Mini Cakes


My hubby was craving cake the other day. 

So I decided to try my new mini cake pan out. 
It's a wilton cake pan that has 12 square mini slots.
and what came to mind, chocolate of course with more chocolate. mmmmm

Recipe

For the cake:
  • 1/2 cup cocoa powder, sifted, plus more for dusting pan
  • 3 3/4 oz. semisweet chocolate, finely chopped
  • 1/2 cup boiling water
  • 1 1/4 cups all-purpose flour
  • 3/4 tsp. baking soda
  • 3/4 tsp. kosher salt
  • 10 Tbsp. (1 1/4 sticks) unsalted butter
  • 1 1/4 cups firmly packed light brown sugar
  • 3 eggs, lightly beaten
  • 2 tsp. vanilla extract
  • 3/4 cups sour cream
  • 3/4 cups semisweet chocolate chips
For the ganache:
  • 3 oz. semisweet chocolate, finely chopped
  • 1 Tbsp. unsalted butter
  • 1/4 cup heavy cream
Have all the ingredients at room temperature.
Preheat an oven to 325 degrees F. Grease your pan; tap out the excess.
To make the cake, in a bowl, combine the 1/2 cup cocoa powder and the chocolate. Add the boiling water and whisk until the chocolate melts and the mixture is smooth and blended. Set aside.
Over a sheet of parchment, sift together the flour, baking soda and salt. Set aside.
In the bowl of an electric mixer fitted with the flat beater, beat the butter on medium speed until smooth and creamy, 30 to 45 seconds. Reduce the speed to low, add the brown sugar and beat until blended. Increase the speed to medium and continue beating until the mixture is light and fluffy, about 5 minutes, stopping the mixer occasionally to scrape down the sides of the bowl. Add the eggs a little at a time, beating until incorporated before adding more and stopping the mixer occasionally to scrape down the sides of the bowl. Beat in the vanilla until incorporated, about 1 minute.
Reduce the speed to low and add the flour mixture in three additions, alternating with the sour cream and beginning and ending with the flour, beating just until blended and no lumps of flour remain. Slowly pour in the chocolate-cocoa mixture and beat until no white streaks are visible, stopping the mixer occasionally to scrape down the sides of the bowl. Using a rubber spatula, gently fold in the chocolate chips.
Pour the batter into the prepared pan, about 3/4 full.
Bake until a toothpick inserted into the center of the cake comes out with only a few moist crumbs attached to it, 25 to 30 minutes. Transfer the pan to a wire rack and let the cake cool upright in the pan for 15 minutes. Invert the pan onto the rack and lift off the pan. Let the cake cool completely, at least 15 minutes.

Meanwhile make the ganache: In a heatproof bowl, combine the chocolate and butter. In a small saucepan over medium-high heat, bring the cream just to a boil. Immediately pour the cream over the chocolate and butter. Whisk until the melt and the mixture is smooth.
Pour the ganache over the top of the cake, allowing the ganache, to drip down the sides. 
Add sprinkles, candies or leave plain.
Let the cake stand until the ganache is set, at least 15 minutes.

Serves 12

Recipe tweaked from one found on: http://lickthebowlgood.blogspot.com (her recipe was for a huge bundt cake and the recipe was double this one.)

Happy Baking!!

Market Yourself Monday
Monday Funday
the Weekend Creative Linky Party
Handmade Tuesdays
Get Your Craft On
the Pinterest Challenge
Strut Your Stuff

Tuesday, December 18, 2012

Favorite Family Cheeseball


Many years ago I played around with a couple cheeseball recipes until I came up with this one that has become a family favorite.  Christmas around our house isn't the same without this yummy munchie.
We like it best with "Wheat Thin" crackers, but you can use any kind you like.  One of these cheeseballs, along with a bag of crackers, makes a great holiday food  gift, also.
                           
                                            FAVORITE FAMILY CHEESEBALL

                                            2 oz crumbled blue cheese
                                          * 1 [8 oz.] jar Kaukauna sharp cheese spread
                                             2  [5 oz.] jars Kraft pimiento cheese spread
                                             2-3 [5 oz.] jars Kraft Old English cheese spread
                                             2 [8 oz.] pkg. cream cheese, softened.
                                             6 TBS. dreid parsley leaves, crushed
                                             4 tsp. dried minced onions
                                             1 cup finely chopped walnuts

                                              2 TBS. dried parsley leaves, crushed
                                              1 cup finely chopped walnuts


*If you can't find the "Kaukauna" sharp cheese spread [or an a similar brand container of sharp cheese] , then substitute another kind as we did here. Thie sharp cheese tubs are usually found in the deli or refrigerator cheese section.  For these balls we substituted a "cheese whiz" type brand, but my preference of taste is a sharper cheese]  Also, the small jars of cheese can be very expensive so watch for them to go on sale. Super Walmart sometimes carries these at the lowest prices.
If you're not a big fan of blue cheese, don't be afraid of using it here. People can't even tell it's there, but it certainly adds to the wonderful flavor of this cheeseball.  I always add some crumbles, mix and then taste.  You don't want the blue cheese to over power the other cheeses, but to just compliment the overall flavor.


In a large bowl, blend cheese sperads, cream cheese, the 6 TBS. parsley leaves, onion and 1 cup chopped nuts. [I usually mix this together with my hands] This picture shows the bowl of second cup of chopped nuts mixed with the 2 TBS. crushed parsley leaves to roll the balls in later.


Shape into six round balls. [they may flatten out a bit at this stage] Place these balls on a wax paper lined cookie sheet. Cover loosely with foil and place in the frig for a few hours or overnight.


Remove cheeseballs from the refrigerator and with your hands, shape into a round ball.  Roll the ball around in the nut/parsley mixture. Wrap each ball in a square of plastic wrap and store in frig until ready to serve.
[wrap a second time in foil if they are going to remain in frig for a few days to make them air tight.]
They can be refrigerated for up to a couple weeks and stored in the freezer for up to 6 months.

We hope your family and friends will love this cheeseball as much as our family does


Monday, November 5, 2012

Caramel Suckers!!! Just like having your own Sugar Daddy, but better!

Caramel Suckers........Just Like Having Your Own Homemade Sugar Daddy

* You CAN use this recipe for dipping Caramel or Caramel apples......it all has to do with what temperature to cook it to.

220 degrees for runnier Caramel perfect for apple dippers or on top of ice cream
234 degrees for Caramel Apples on a stick
245-250 degrees for stiffer Caramel Suckers or Caramel Squares.

This Caramel recipe comes from my sister LaVon's best friend Korrie who has some of the BEST recipes. Whenever I eat something extremely good at LaVons it usually is a concoction from Korrie!!!! These suckers are NOT rock hard, but still have a bit of chew to them, but they keep there shape. Yum Yum Yummmy!!! I made this batch for my mom to sell some Caramel Suckers at her Holiday Boutique.
Supplies
1 can Sweetened Condensed Milk
2/3 Cup Heavy Whipping Cream
1/2 Cup Butter
1 Cup Karo Syrup
1 Cup Brown Sugar
1 Cup White Sugar
1 tsp Vanilla
Candy Thermometer
Glass measuring cup with spout...at least 4 cup capacity
Hard Candy Molds...............you will need about 5-7 molds for this size recipe
Sucker Sticks
Pam Spray

 
Start with getting your candy molds ready. Spray all cavities lightly with Pam and have all sticks ready. My Owl molds have space to put candy eyes......get that ready as well.

Let's get started!!!! Combine in a glass measuring cup the Sweetened Condensed Milk with Heavy Whipping Cream and stir until blended well. Set aside.
In a large pot combine Karo syrup, White Sugar and Brown Sugar. Mix and cook on a high heat.

Once mixture starts boiling add butter. Once butter is melted allow mixture to achieve a hard boil, then turn down to a medium/high heat.
Gradually add condensed milk/heavy cream mixture so that it always has a slight boil. Make sure you are stirring constantly. Once all the cream mixture is added (clean measuring cup for later use) attach Candy Thermometer so that it is NOT touching the bottom, but is completely covered by the caramel mixture. Continue to stir until you reach desired temperature. See temperature chart at begining of post. You may have to turn heat up slightly, but don't go too high or you will burn it. It may take 7-10 minutes to reach the right temperature. Be patient. 

Once you reach desired temperature...remove pot from heat and stir in vanilla. Transfer caramel to glass measuring cup.

If you are making caramel apples.....you can start dipping and swirling them in the pot right now. If you want caramel squares.....put it in a deep cookie sheet lined with wax paper or a Pam sprayed container.

To make Suckers....................................

Start pouring Caramel into candy molds slowly until you get the hang of it's thickness.
Let Caramel set up for 2-3 hours inside molds.
Pop them out and
Hooray......Your cute Owl Caramel Suckers are done. Place them in sucker bags and crank the twist ties on.

This Caramel recipe has made me many friends. Enjoy!!!


Thursday, October 18, 2012

Food For My Lovie~ Recipe #1 Yummy Pepper Beef Hoagies~You can Freeze them!!!

OK, so I am going to start posting recipes in the category ~ Food For My Lovie~ My husband started calling me "Lovie" shortly after we got married and it is officially our pet names for each other. So needless to say these are going to be recipes that I make for him occasionally and some that he makes for me. Hope you enjoy them!

Yummy Pepper Beef Hoagies


I am always looking for recipes for yummy lunches for my husband. He works construction as an electrician and I know sometime lunch is the only time he gets to relax. I don't want him always having lame sandwiches and I know sometime warm gooey cheese/meat sandwiches you put in the microwave are a pleasant change. I also try to come up with recipes that I can freeze in freezer paper and he can microwave at work. Here is one of His new favorites!


Ingredients:
1 Lb. Deli Sliced Roast Beef
1/2 Lb. Pepper Jack Cheese~ Grated
1 Onion ~Chopped
1 Red Pepper~ Chopped
1 TB Olive Oil or other cooking oil
Salt & Pepper to taste
6 Hoagie Buns
****If you plan to freeze them....you need freezer paper and tape
Also NOTE: When I made this I did a quadrupole batch so we could have some for dinner that night and I had enough to make 20 to freeze!
 Put your Tablespoon of Olive Oil in a skillet and saute your Onion and Red Pepper. Chop up Roast Beef
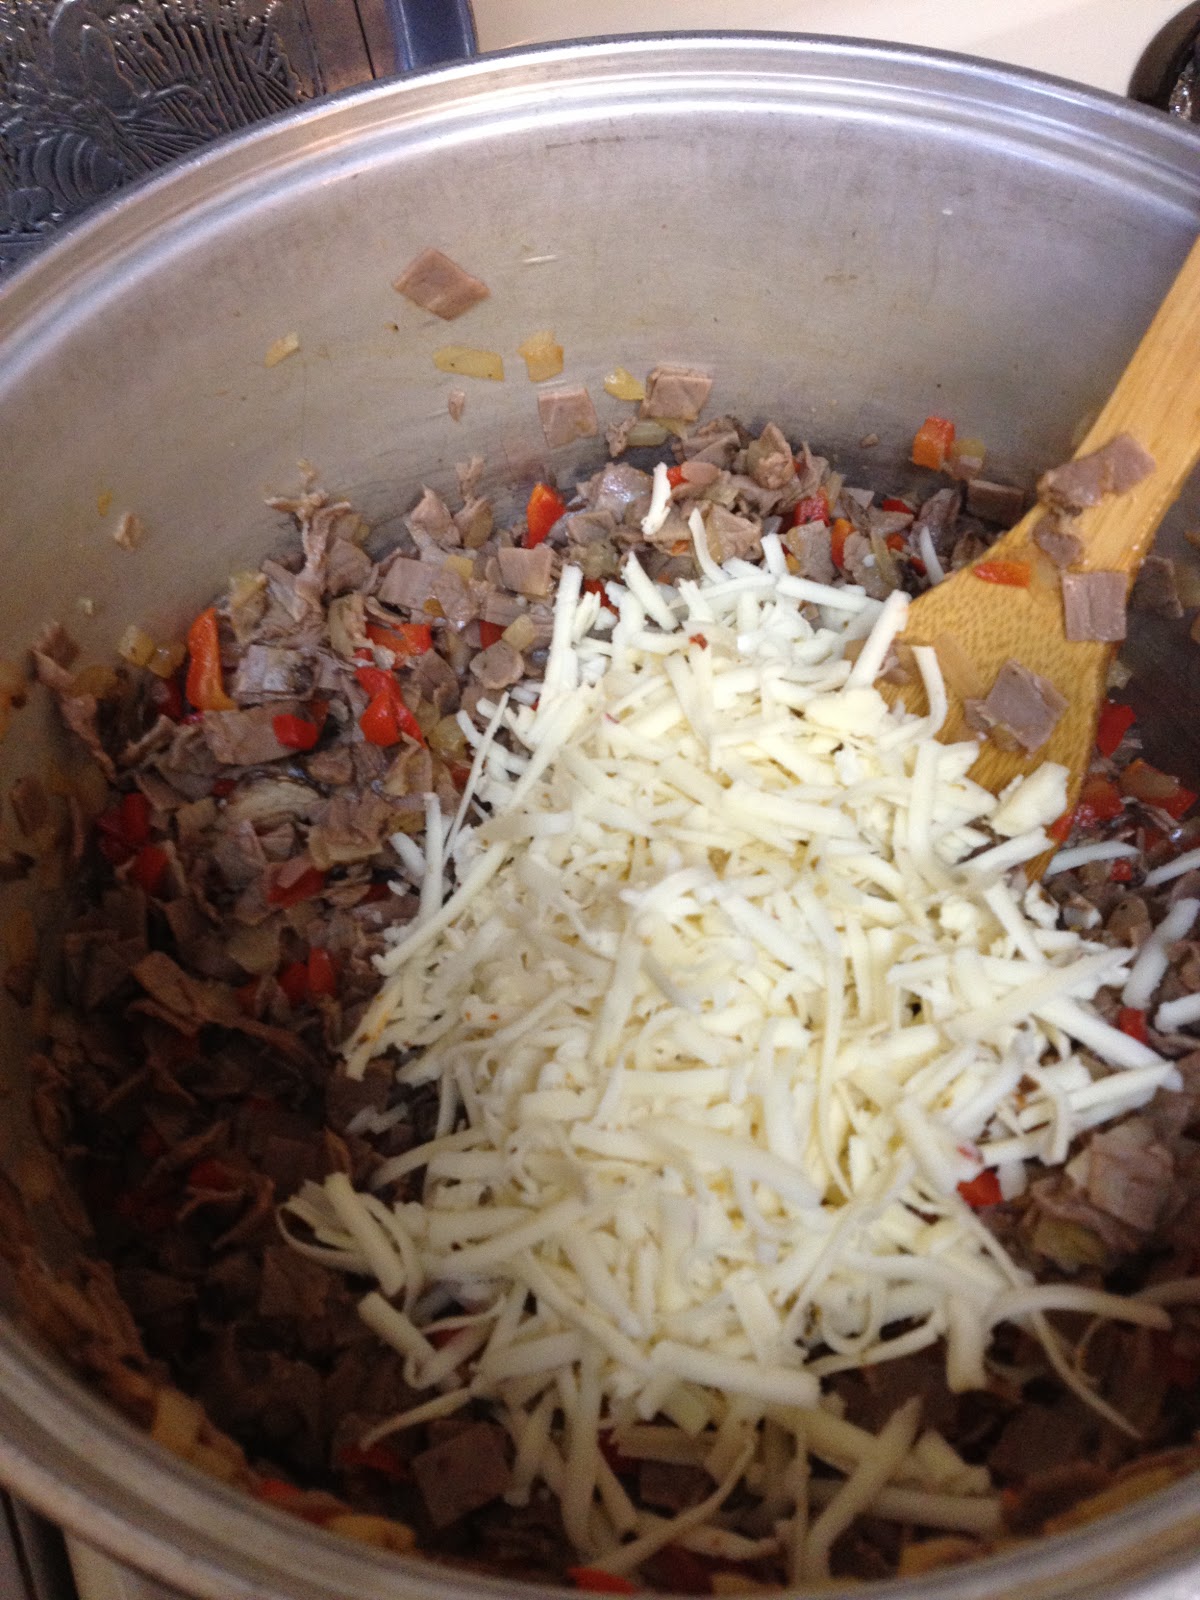
 Once Onion and Red Pepper are starting to get translucent...add Roast Beef. Add Salt and Pepper to taste. Mix it up and let it all cook for about 4-5 minutes and then add grated cheese. Gradually stir in cheese until melted and well mixed. (Note: my batch was so big I had to mix it in a bigger pot. If you are doing a single batch you will only need the one skillet.)
Your Meat portion is ready. I like to toast my hoagie buns in the oven (turn broiler on med/high and toast 2-3 minutes...don't burn it) This is not necessary BUT if you are going to freeze sandwiches toasting them is a MUST!!!

I like using a cookie dough scoop, but an ice cream scoop does fine too......well OK you can use a regular spoon too. I stuff them pretty good with 2-3 scoops. Hoot Hoot...you have a Yummy Pepper Beef Hoagie. Drool Drool Drool!!!

Here are additional steps if you want to freeze reheat able sandwiches:

 Freezer paper....I get mine from Walmart and tape....seems like I found this tape where the freezer paper was. It tears easy when you are ready to eat your sandwich.
Make sure your meat is cooled. i know this may sound weird, but if it is hot it will steam up your hoagie while wrapped and make it soggie. I just put it in the fridge until I am ready to wrap them. 
You need a 1 1/2 foot piece of wax paper (I am just estimating...I always eye it) for each sandwich. Place your meat filled hoagie on a corner of the wax paper ...glossy side up. Pull the corner over your hoagie and roll over so that the flat part of the hoagie is facing up under the paper. Bring each side into the middle and finish rolling. Try to keep it tight as you roll. This is just like rolling a burrito.

Then tape the end and even the sides if it looks like air may get in. Mark it with a pen and make sure you have your date when made. Personally I do not know how long they last in the freezer, but imagine at least 3-4 months. The ones in the store are OK for 9 mos-1 year in the freezer.
I saved an old Chicken Nugget box and keep my Yummy Hoagies in there, but you can just throw them in the freezer as is.

Microwave instructions are:
Break tape and slightly unwrap so that steam can escape.
Microwave 2-2 1/2 minutes on high (frozen)
or
1 1/2 minutes on high (thawed)
Let it stand in wrapper additional 1-2 minutes before unwrapping completely!!!
Eat and be Merry!!!

Let me know how they turned out!!!