Showing posts with label ribbon. Show all posts

Friday, December 6, 2013

Christmas Series Day 15 - Christmas Ribbon Projects Galore/Scrapbook Steals Blog Hop


On the 15th Day of Christmas
Santa brought to me

A great idea for a craft Project!
So I am sharing it with all of you
Today I am personally posting :)


My gift to You is a post on
 "Christmas Ribbon Projects Galore"

Which is also a part of the Scrapbook Steals Blog Hop
If you aren't familiar with Scrapbook Steals, it's a scrapbook site that offers twice a daily scrapbook steals (discounted product) for a great price. They have some of the coolest scrapbook supplies on their site. Check them out HERE

I buy items from this company all the time to make a lot of my fantastic projects.


I want to show you how to take 4 different rolls of ribbon (I'm using
American Crafts Everyday Ribbons) and make 2 different, make that 4 projects.
and to top it off not only are they useful but work for christmas time.


My 1st project - which is actually a 3 in 1.
 
Supplies
  • Solid Black American Craft Ribbon
  • Turquoise Chevron American Craft Ribbon
  • String of 16 bells (found at the dollar store)
  • hot glue gun & glue
  • buttons
  • scissors
  • turquoise paint
  • paintbrush
 
Here is how you make it:
  • Cut both the black & turquoise ribbon into 8 even pieces (each)
  • Tie a bow on each bell, alternating the colors
  • add a button to the middle of each bows (I alternated white and turquoise buttons on this step)
  • the bells on my string we're gold and silver so I then painted the gold ones turquoise
  • now your done.
 
What you can now do with this:
  • I added some more black ribbon to each end of the strand and tada you now have a unique jingly necklace. 
  • The second way to use this is to hang it on your doorknob and now you have a door bell.
  • Third, which is my favorite, is to hang it on the back of a chair and now you have festive chair decor.


My 2nd Project is: a Gift Tag

Now for the green and pink. your probably wondering how is she going to add pink into christmas. easy peesy. I made a festive gift tag. christmas doesn't always have to be green & red. The more colors the better.
 
 
Supplies:
  • Green American Crafts Ribbon
  • Pink American Crafts Ribbon
  • Cardstock
  • Scissors
  • Embellisment
  • Glue
  • Gem
  • decorative scissors
  • hole punch
 
How to:
  • cut a piece of cardstock 3" x 8" (you can change this)
  • fold the cardstock in half
  • cut 3 pieces of 3" pieces of ribbon & glue to front of card
  • cut 1 piece of ribbon 6 1/8", wrap this around the front & glue on the backside
  • cut a couple more small pieces of ribbon to add under the snowflake
  • apply the snowflake to the small pieces & top off with gem
  • cut the bottom of the top flap with decorate scissors
  • punch a hole in one of the top corners for ribbon
  • End by writing in the inside of the card To: & From:
 
.You now have a snazzy gift tag perfect
 for that gift you can't wait to give.

this post is also a part of the scrapbooksteals blog hop. so go and check out a few more ideas.
Star the HOP...... HERE!!!
Karen Nofziger


Tuesday, February 26, 2013

Turning a shoebox into a ribbon organizer


This is how you do it .. 

 How to turn an ordinary shoebox into a highly organized ribbon box
 using recycled items: a shoebox or smaller box and cardboard

I took strips of cardboard about 2 1/2 -3" x 8" and rolled my loose
 ribbon onto the cardboard sheets. 

Start by taping one of the loose ends to the board and then start rolling the ribbon
 around until you get to the other end of your ribbon. Secure to the board by either 
using tape or a straight pin. Then continue on to your next piece of ribbon.  
Once you are finished you can now storage in a regular shoebox which is
 easy to see all your ribbons at one time. 


I love how organized and neat it looks in the box. 

Happy Organizing everyone


Sunday, December 23, 2012

Wrapping & Decorating a present with ONLY wrapping paper.


We all end up with left over strips of wrapping paper when wrapping our gifts. So instead of throwing them out reuse them and turn them into some fun curls to decorate the top of your gift.


Fold a strip of wrapping paper in half. having the crease at the top is important. 
 Now if you aren't comfortable cutting in straight lines or are a bit of a perfectionist then take your ruler and draw lines down your paper. You can choose how wide the stripes are. 
 Leave at least a 1/4 on an inch at the top the won't be cut. This is the side that has been creased. 
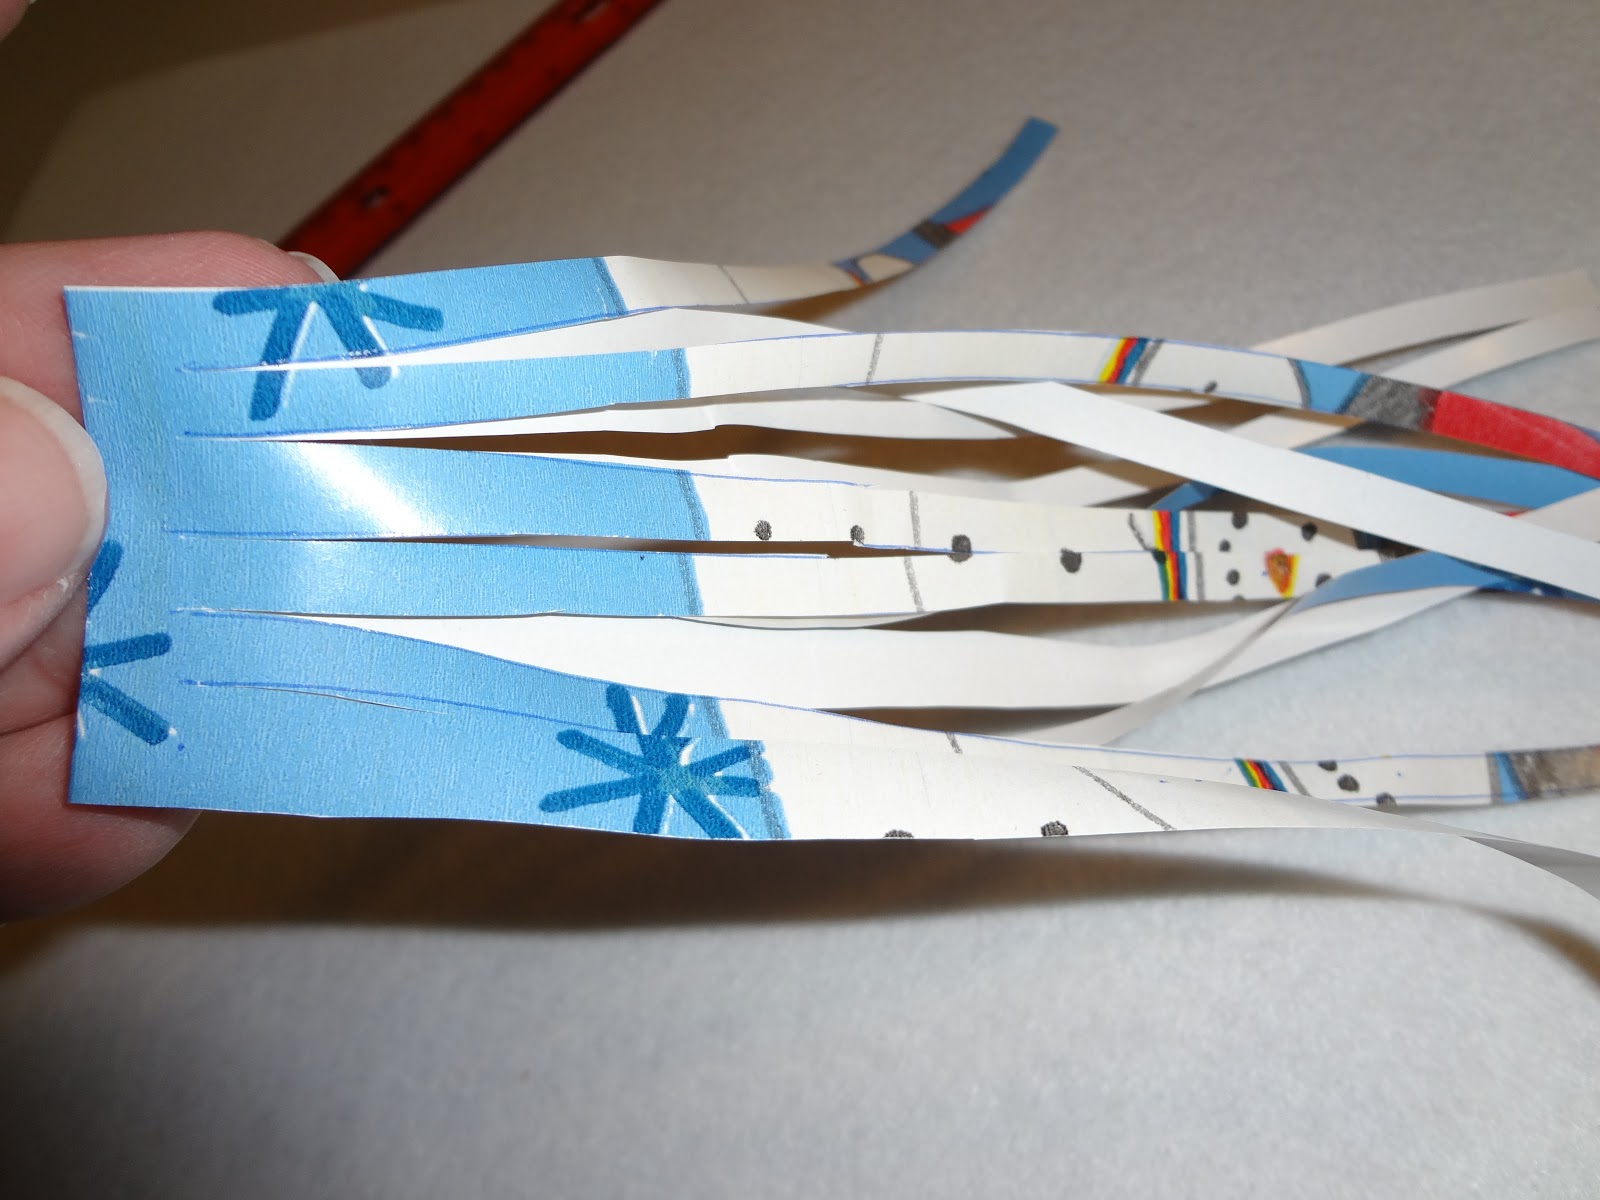
 take your scissors and cut up each line. remember stop at the end of the line. Do not cut all the way through. 
 Open your scissors and place one of the tips of the scissors on the underside of the 1st strand.
you are going to CAREFULLY run your scissors down the back of the strand. this will curl it. Don't pull to hard or the strand will break off. 
 Here is what your curls will look like once you are done with each strand.
 I always fold the creased side in half and then place a piece of tape over the fold.

 Now place on your wrapped gift.
 To make a gift tag with more of your leftover wrapping paper. Cut around one of the designs. I chose to cut around one of the snowflakes. 
 Once I cut the 1 snowflake out I applied glue to the back of it and applied it to the backside of another piece of wrapping paper. 
 then cut around the snowflake again.
 I folded over a square piece of leftover paper and applied my snowflake and took a black marker to it. 

It would have also been very fun to turn one of the snowmen on the paper into a tag. 

Hope you have some fun with this new technique.


Saturday, December 15, 2012

Christmas Tree Wreaths

I wanted to add more color to my tree. but I had a hard time finding oranges for my tree.
 If you walk down the christmas aisle in walmart you can find every color BUT orange.
 So I found some nice glass beads and pearls 
These are very easy to make.
String the beads & pearls onto clear fishing wire and tie off.
Add a ribbon where you tied off (to cover the knot) and add more to it. 


Thursday, December 13, 2012

Christmas Gift Tins

There's a lot to say for "presentation".   The way something looks is what makes us want to take a closer look. I have always enjoyed wrapping presents and the creative side of me has always loved to
take a little extra care in making packages beautiful.  It may take a little more time to do the extra details but it's always a joy to see the finished product and then see the recipient's face light up when you give her the gift.

This year I decided to have some fun making some gift containers for some of my Christmas gifts.
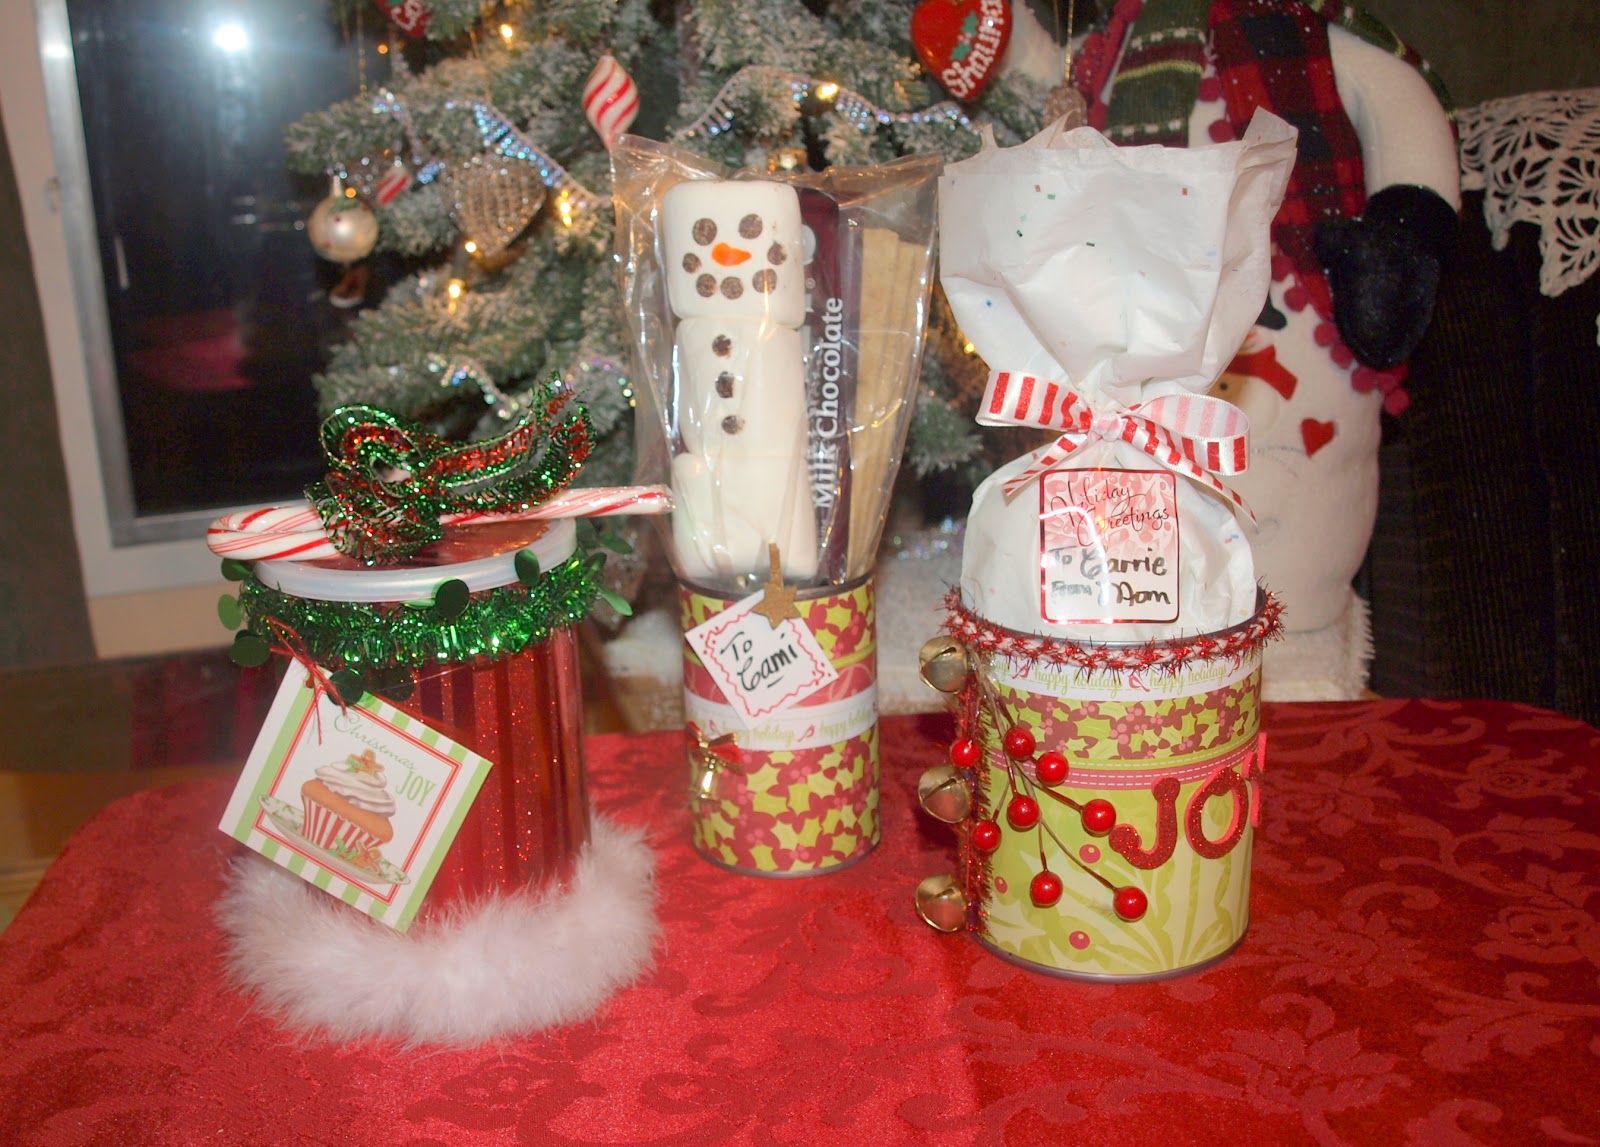
I saved some empty food cans,  made sure there were no jagged edges] and then soaked them for a bit in some soapy water to get the labels off.  Once dry, I was ready to start decorating the cans.


I used a "Doritos" can, green beans can and a large tomato can.  [I did not need to soak the "Doritos can.  I put the wrapping paper directly onto the can as is]

I then gather what craft items I need to decorate the cans. [wrapping paper, scrapbook papers, Christmas embellishments, ribbon and cards/tags. etc/]


I used double sided scotch tape and hot glue as my adhesives.  I adhered the papers on first with the double sided tape and then the embellishments with the hot glue. 


I used wrapping paper on the red container at the left and scrapbook papers to the other two.
You can use these containers for any kind of gift. [food items or other things : socks, jewelry, etc]
And, you can decorate them for any occasion.


The picture below shows how I turned the "joy" can upside down to be used as a candle holder.  You could make a can for this specific purpose or enclose instructions with the gift can that once the gift is removed, the container could be used for this. You might include the candle inside as the gift.


So, give this fun idea a try.  Save some cans and let your creative juices flow.
Happy Creating!